Chiikawa Evolution How to Train Power Efficiently
Swing smarter in the pasture, stand on the best multiplier pads, and know when Level or Power should drive your next move.
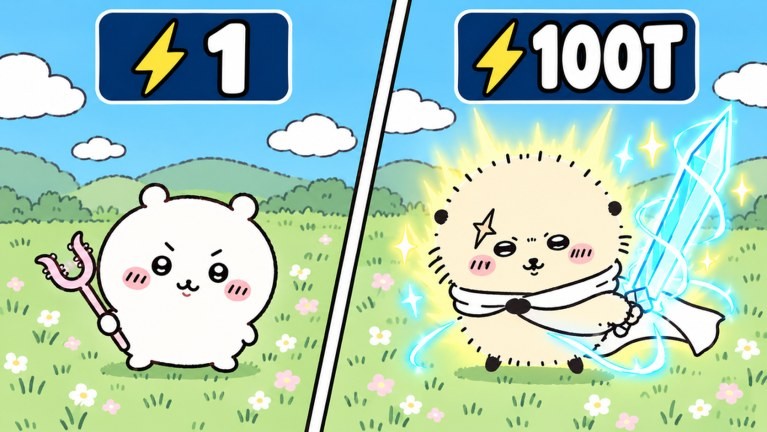
Why Power training is the whole early game
In +1 Chiikawa Evolution by HVNstudio, almost every gate asks for Power. Walls will not break, reward pads stay locked, and new worlds feel unreachable until your training rate catches up. This guide focuses on how to train Power efficiently: pasture swinging, multiplier pads, controls, when to relocate, how Level differs from Power, AFK habits that help instead of hurt, and how training feeds Wins and rebirth.
If you are brand new, skim Getting Started first so the HUD and first wall feel familiar. Then treat this page as the long-form training playbook you reopen every time a higher pad opens.
The training loop in one sentence
Stand in the strongest training zone you can reach, swing consistently, watch Power climb toward the next wall, break that wall, claim Wins, equip a better Chiikawa when you can afford one, and only then rebirth for a multiplier that makes the next rebuild faster. Training is not a separate mini-game—it is the engine behind walls and worlds, Wins, and rebirth.
Controls and swing basics
Movement uses standard Roblox WASD (or thumbstick on mobile). Your primary training action is click / tap to swing. You do not need fancy combos on day one: position yourself on a training pad or pasture spot, keep swinging, and let Power and Level tick upward.
Practical control tips:
- Face a clear direction so you are not walking off the pad between swings.
- On desktop, a steady click rhythm beats frantic mashing that drifts your camera.
- On mobile, lock your thumb position so you do not accidentally open menus mid-farm.
- After a wall clear, remount the new pad before you resume AFK swinging—location matters more than click speed.
If Power is not rising, you are usually unequipped, standing in a dead zone, or staring at a menu. Confirm your character is equipped, then return to the pad.
Pasture swinging vs multiplier pads
The starter pasture teaches the loop: swing, gain Power, eye the nearest wall. As soon as a wall opens a better multiplier pad or training area, move. Lingering in the first pasture after a stronger zone unlocks is the most common efficiency leak in Chiikawa Evolution.
How to choose a pad:
- Read any on-world multiplier text or compare Power gain over a fixed 30–60 second sample.
- Prefer the highest multiplier you can physically stand on right now—not the theoretical best pad behind a wall you cannot break.
- After every clear, re-sample. A pad that was “best” five minutes ago may be outdated the moment the next gate falls.
Map context for which pastures and worlds appear after rebirth lives in Walls and Worlds. Training advice on this page assumes you always migrate forward when the route allows.
Level vs Power — chase the right number
Power is the wall gate. When a wall lists a Power requirement, that is your short-term goalpost. Level often gates rebirth and other progression buttons. Efficient players track both without confusing them:
- If the next wall is close, prioritize raw Power gain (best pad + best equip).
- If walls are trivial but rebirth is locked on Level, keep swinging anyway—Level still climbs from training, and the rebirth multiplier will repay the session.
- Do not ignore a ready rebirth forever just to inflate Power that will reset. Power is disposable; the multiplier is not.
Rebirth resets Power and Level while keeping Wins, Diamonds, gear, characters, certificates, and unlocked worlds. That is why strong training habits matter after every reset: you are refilling a battery, not rebuilding your entire account. Details sit in How to Rebirth.
When to move zones
Move zones when any of these are true:
- You just broke a wall that opens a higher multiplier pad.
- A timed Power sample shows another reachable pad outpaces your current spot.
- You finished claiming nearby Wins pads and the next training cluster is deeper in the world.
- You rebirth and a new world (or higher pasture) becomes available—go there immediately.
Stay put when:
- The “better” pad is behind a wall you still cannot break.
- You are seconds from a Level threshold for rebirth and relocating would waste the last ticks.
- You are mid-claim on reward pads; bank Wins first, then relocate.
Zone discipline turns the same click rate into dramatically more Power per minute.
Equipped characters multiply every swing
Training without the best equipped Chiikawa is voluntary slow mode. Unlocking a unit is not enough—you must equip it so the Power bonus applies. After each shop purchase, open the character UI, equip the strongest option, then return to the pad. Pair this habit with How to Unlock Characters, the Characters Hub, and How to Equip when you need the unlock-versus-equip breakdown.
A mediocre pad with a strong equip often beats a great pad with a starter still equipped. Fix equip first, then pad second, then worry about click rhythm.
AFK habits that help (and ones that hurt)
Chiikawa Evolution’s swing loop invites light AFK. Use it carefully:
Helpful AFK habits
- Park on the highest unlocked multiplier pad before you tab out.
- Confirm equip and camera so you do not AFK facing a wall you cannot break while standing off-pad.
- Claim Wins pads before a long AFK so currency is banked if you reconnect after a kick.
- Recheck the server after long absences—patches can move pads or retune Power gates (Latest Patch Notes).
Harmful AFK habits
- AFK in the starter pasture after better zones open.
- Leaving an old Chiikawa equipped “until later.”
- Ignoring rebirth for hours while Power piles up against a soft wall you could already clear and reset past.
- Running unverified auto-farm tools without reading safety notes on the Scripts Hub—account risk is always yours.
Short, intentional AFK on the right pad beats all-day AFK on the wrong one.
Convert Power into Wins on purpose
Power that never breaks a wall is only a scoreboard. As soon as a wall is breakable, clear it and step on the reward pad for Wins. Wins fund characters that raise future training speed, and Wins persist through rebirth. The efficient trainer therefore alternates: train → break → claim → equip if affordable → train again.
Deep Wins routing lives in How to Get Wins. Use that guide when pad order or spend priority is the bottleneck, not swing rate.
Session templates
Day-one pasture session (20–40 minutes)
- Join, redeem any verified codes from the Codes Hub.
- Swing in the pasture until the first wall’s Power is met.
- Break walls in order; claim every pad.
- Buy and equip the first meaningful Power Chiikawa.
- Move to any new multiplier pad you unlocked.
- Repeat until rebirth appears; bank Wins, then reset if ready.
Post-rebirth rebuild session
- Confirm best character is still equipped.
- Travel to the highest world and pad you can use.
- Time a one-minute Power sample; relocate if another pad wins.
- Clear every wall you can reach this session.
- Spend Wins on the next efficiency unlock if priced reasonably.
- Rebirth again when Level allows and pads are claimed.
Post-patch scout session
After HVNstudio updates (including the 10 November 2026 Roblox update window), spend five minutes re-sampling pads and wall requirements before a long AFK. Training advice goes stale when gates move—see the Updates Hub and latest patch.
Common Power training mistakes
- Measuring “progress” only by Power while leaving Wins pads unclaimed.
- Rebirth-mashing without ever upgrading the equipped character.
- Refusing to leave the first pasture out of habit.
- Confusing Level goals with wall Power goals and stalling on the wrong metric.
- Trusting outdated YouTube AFK spots filmed before newer worlds opened.
Related reading
- Getting Started — day-one orientation
- Walls and Worlds — where Power gates sit
- How to Get Wins — convert clears into currency
- How to Rebirth — when to reset Power and Level
- Guides Hub — full tutorial index
- Latest Patch Notes — re-verify pads after updates
Train where the multiplier is highest, swing with your best Chiikawa equipped, break walls as soon as Power allows, and treat every rebirth as a chance to rebuild faster than last time. That is efficient Power training in Chiikawa Evolution—and it scales from the pasture to the newest world without wasting hours on the wrong pad.
Frequently Asked Questions
Quick answers for Chiikawa Evolution players.
Where should I train Power first in Chiikawa Evolution?
Start in the pasture and swing until you can break the nearest walls. The moment a higher multiplier pad opens, move there instead of staying in the starter zone.
What is the difference between Level and Power?
Power is the usual wall requirement. Level often gates rebirth. Train for Power to clear walls; keep an eye on Level so you can take multipliers when they are ready.
Do I need to equip a character for training bonuses?
Yes. Unlocking alone does not apply the Power bonus. Equip your strongest Chiikawa, then stand on the best pad you can reach.
Is AFK training worth it?
Light AFK on the highest unlocked multiplier pad helps. AFK in an outdated pasture or with a weak equip wastes the session—fix location and equip first.
When should I stop training and rebirth?
When rebirth is available, nearby Wins pads are claimed, and the new multiplier or world clearly beats more grinding at your current rate. See the rebirth guide for edge cases.